

Build Setup:
The following are just recommended setups. Feel free to explore this build how you wish.
3S 1100mah setup on 4”:
Fouride in 4"
FPVCycle 2203 3450kv
Gemfan 4023
AIO Toothpick board
3S 1100mah 130C
Capacitor
Vista kit
This setup is the main recommended option. It flies fantastic, easy to tune, low overall risk of burning components and can carry light HD cameras like the Insta360go very well. A GoPro Session is no problem either but it will begin to impact performance.
4S 1100mah setup on 4”:
Fouride in 4"
FPVCycle 2203 3000kv
Gemfan 4023
4S AIO Toothpick board
4S 1100mah 130C
Capacitor
Vista kit
About ~15% more powerful than the 3S variant, this one will be notably faster and be able to carry a GoPro Session more easily. It is still easy to fly with excellent characteristics but it will be more difficult to tune. This is a symptom of the higher voltage and overall higher power output. Another result of the higher voltage is a very slight increased chance of burning components.
3S 1100mah setup on 5”:
Fouride in 5"
FPVCycle 2203 3000kv
Gemfan 5125
4S AIO Toothpick board
3S 1100mah 130C
Capacitor
Vista kit
This particular setup is a bit of a treat. It performs remarkably well, it has no issues carrying a GoPro Session, is about as fast as the 4” variation on 4S, is easy to tune and an overall joy to fly. It’s quite impressive how much performance can come from such a small 3S 1100mah pack. The downside is that the frame is primarily intended for 4” so the arms are longer which makes them more susceptible to fracture in crashes.
The 5” build on this frame should really be reserved for users that are at least a little experienced such that crashing is usually the exception rather than the rule when you go out to fly.
About the 2204 Motor:
The 2203 motor was specifically designed for 3” CineWhoops and 4” setups. You don’t need to use this motor for this frame. Any 1407-2004 motor is suitable. The advantages of this motor over a typical 1407-1608 or 2004 are the following:
- More robust build with a 3mm internal shaft rather than smaller
- Better magnet to inter-magnet spacing ratio for smoother throttle control
- Torque band shifted lower in the RPM range which provides enhanced control
- More efficient in the mid to low end due to shifted torque curve
- 8mm bearing for improved durability, efficiency and smoothness of control
About our batteries:
At this point, we only offer the highest available grade cells from GNB. Buying lower grade packs is a little cheaper but the cell quality is so much worse that it doesn’t make sense to do so. Similarly, there are grossly more expensive batteries but they haven’t proved themselves to be much different from any other companies high grade cell. We work with GNB because they provide us with excellent products at a reasonable price and have excellent professional customer service when we need some engineering assistance. There are many other good companies out there as well, just too many to track and neither of which are seemingly any different than another.
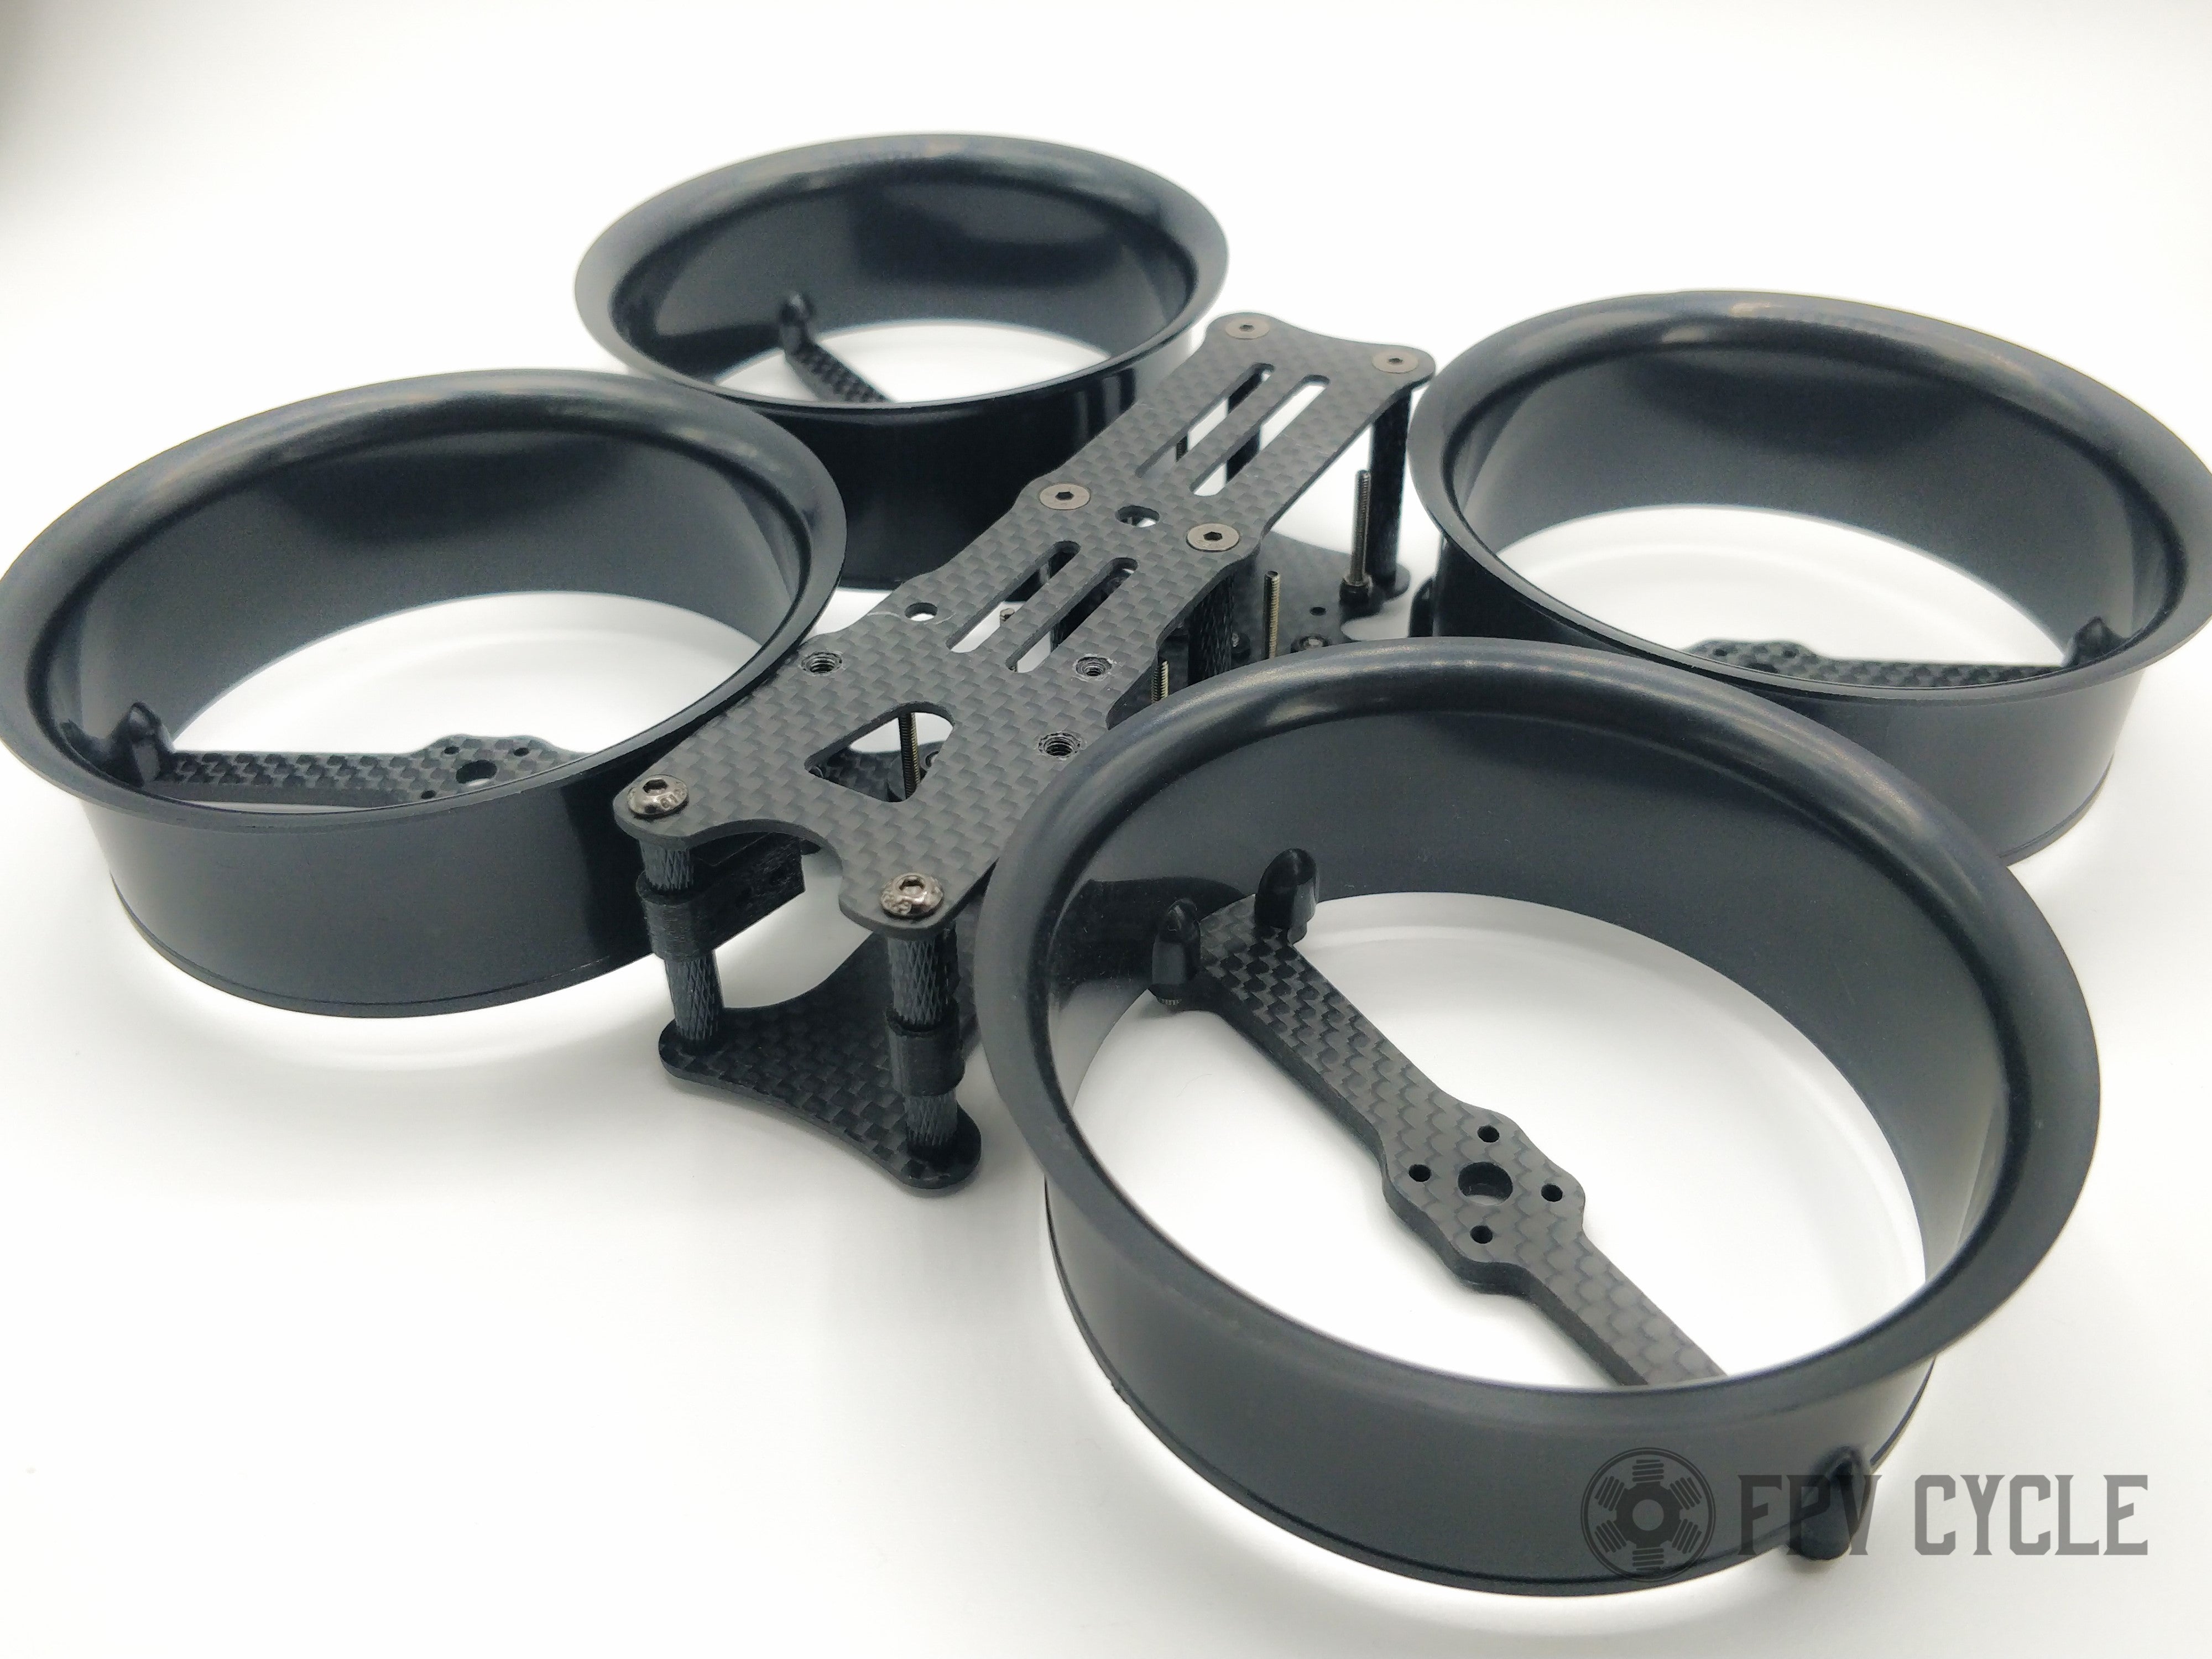
The Fouride Concept:
The Fouride is intended to be a lower weight build that will carry the lower weight HD cameras of today along with analog or the DJI/Caddx Vista system while providing suitable protection for the Vista and excellent flight performance. Given the electronic component environment of today, the design is centered around taking advantage of recent high powered AIO Whoop boards while also supporting the 20x20 stacks of yesteryear.
Flight performance:
Weight distribution refers to the arrangement of components on a frame that governs how spread out or tight the weight of those components are packaged. This is a major factor of flight performance. All up weight even takes a back seat to weight distribution much of the time. The more tightly packaged the weight is around the center of gravity (center of rotation in free space), the easier time the flight controller will have managing that weight and executing your commands. As you reduce the prop size, weight distribution becomes increasingly important.
With the build height of the Fouride being just 15mm, one of the primary requirements of the design was to package it’s component weight as tightly as possible without making it overly difficult to build and manage. The DJI system is only 13mm tall which just fits and with the advent of numerous cost effective whoop boards that are more than capable of managing a mid weight 4” build, there isn’t a need to have more than a single board solution. The overall electronics build of the frame simplifies down to just two components, the whoop board and the Vista system. Of course analog components fit as well but they’re typically smaller than the Vista so it shouldn’t be an issue.
The frame is a wide X pattern. While a true X is preferred, it’s just not reasonable to have that much prop in view when you have an HD system on board. In order to get the props further out of view, the arms would need to be much much longer with the same 4” props or the fuselage be much longer to protrude out the front. Both of which would increase weight and reduce durability. Also not reasonable. The flight performance of a wide X over a true X for freestyle is that you give up some pitch control performance and gain some improved roll control feel. Considering we’re not usually doing as much flipping as rolling when flying freestyle, this is a suitable compromise to gain a smaller, lighter and more durable package.
How it started and why it’s a 4”:
The concept of this design started out as a small package to carry the DJI Vista system and provide suitable protection and excellent flight performance. Looking at the electronic landscape of today, it’s now pretty clear that things are getting smaller and in most cases, a simple AIO Whoop board is sufficient. Now just to decide the location of the battery and HD camera which are the heaviest components on the craft. It’s designed for freestyle so having the battery and camera on top is all but a requirement. The next step was to decide how to arrange these components optimally.
There are two primary ways the electronics could be laid out. Side by side or vertically on top of one another. Because of the Vista units height, stacking things vertically would result in at least a 25mm stack if you were good at building. It would not be acceptable to have the battery and camera 25+mm off the main deck. The resulting flight performance would suffer. Side by side electronics is the only option. Once wrapped in carbon and standoffs, the fuselage length was long enough such that you could run 3” props, but 4” also fit without much of a squeeze. The resulting frame became a 4” but you can run 3” props on it if you wish. With 4”, you get a bit of prop in the HD camera. With 3” you don’t get any.
Protection:
Since the very beginning with the original Hyperlite, Hyperlite Floss and even before, reasonable component protection has been a theme. This concept has just been refined over time after several thousands of pictures of crashes from customers. With the Fouride, things are a little different.
Vertical plates usually do a somewhat better job protecting the camera from light to medium damage. Standoffs do fine but much of the time the lens protrudes from the standoffs just a little bit or the design of the top plate is compromised a bit and can break somewhat easier. Because of this designs low 15mm build height, squeezing the DJI camera into that space was a bit of a problem. It actually took over a month to figure out a nice clean way to hold those vertical plates on. The end result is a front end that’s pretty robust but not indestructible by any standards.
The middle of the frame has one single standoff. This is for the specific reason of maintaining the height of the center to keep it from imploding into the Vista unit. This center standoff puts the top plate under tension as well because it’s a half mm taller than the overall build height. Think of it as a tenting pole.
Overall, this frame is not designed to be a basher but much thought has been put into providing reasonable protection for critical components. Of course the motor bumpers are there as well.
Convenience:
This is often an area completely overlooked but it is a very meaningful area when you build many things. This frame has individual arms. None of the arm screws interact with the standoffs and the mounting screws for the arms are even moved far away from the stack platform so you have the entire 15mm build height to work with. No pesky screw heads under the electronics to deal with. The front end is also modular and can be replaced without much effort in the event of a fracture from impact. The mounting platform for the HD camera on top uses press nuts such that you can undo the entire mount with just the four screws. This same mounting platform fits other frames too like the CineSplore and CineGlide. Finally, some nifty mounting points for antennas or whatnot. We offer some antenna mounts but it’s pretty easy for anyone to model their own mount of sorts to tie onto the side mount or the rear standoffs. Your time is valuable. We don’t want to waste a moment of it.
3 comments
Ben Lacayo
Will there be deadcat arms for either the 4 or 5 inch versions?
Will there be deadcat arms for either the 4 or 5 inch versions?
Tyler
I was just wondering where I can find the session mount for this quad. Also will this fit a rush tank mini in the back? Love the work you’re doing!!
I was just wondering where I can find the session mount for this quad. Also will this fit a rush tank mini in the back? Love the work you’re doing!!
Stefan
Hey bob I bought a fouride and a jhemcu aio fc (I’ve used these on a few builds recently) and I was just wondering, when you mount the fc the forward arrow on the fc is no longer facing toward its about 45 degrees to the right or left depending on which side you want the usb connector on. Did you rotate the fc in betaflight? If not can you let me know how you resolved this issue ?? Thanks
Stefan